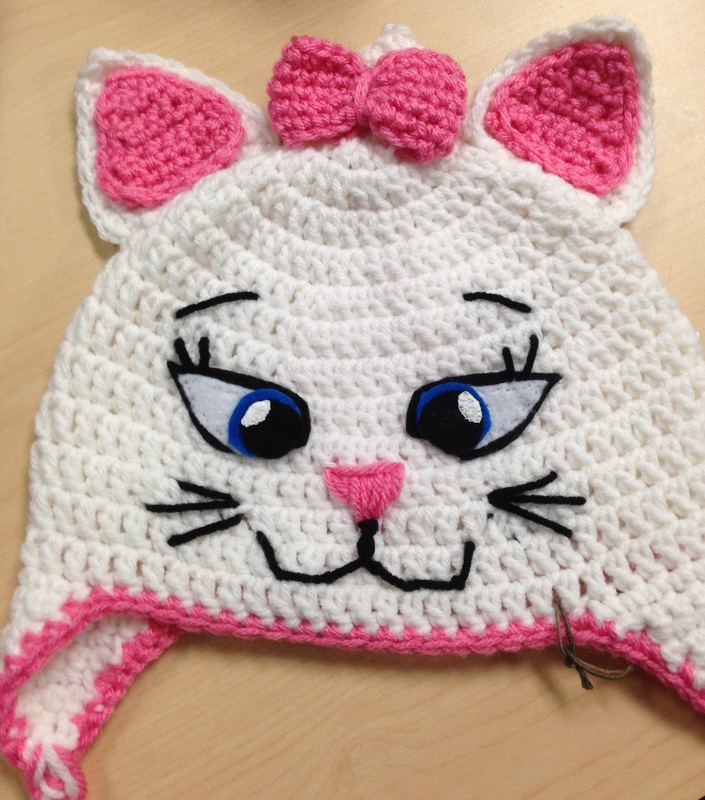
I shared this photo on a social media page today and had such a HUGE response for a pattern, I wanted to make sure I put this up asap for all those wonderful enough to comment and like my work. It was really amazing the comments and such sweet feedback from everyone. Please be kind. I've never posted a pattern before. I usually just keep my pattern written up in a little notebook with scribbles and such for personal use. I hope you find this FREE pattern easy enough to understand!
You'll Need: White, Pink & Black yarn. Yarn Needle. Scissors, White & Black Thread, Fabric Glue, White permanent fabric paint, Felt in White, Black & Blue.
Hook: 5.0 mm
Size: Toddler. (This hat fit both my 2 year and my 6 year old just fine. I'm sure you can add or subtract a row in the increases and length to suite your needs but this is how I made Marie.)
*At the end of each row, sl st to join. Chain does not count as a stitch.
HAT
Row 1: 11 dc in a magic circle.
Row 2: 2 dc in each st. end 22 dc
Row 3: 2 dc in first st. 1 dc in next st. (repeat all the way around) end 33 dc
Row 4: 2 dc in first st. 1 dc in next 2 st. (repeat all the way around) end 44 dc
Row 5: 2 dc in first st. 1 dc in next 3 st. (repeat all the way around) end 55 dc
Row 6-13: 1 dc in each st around.
cut and weave ends.
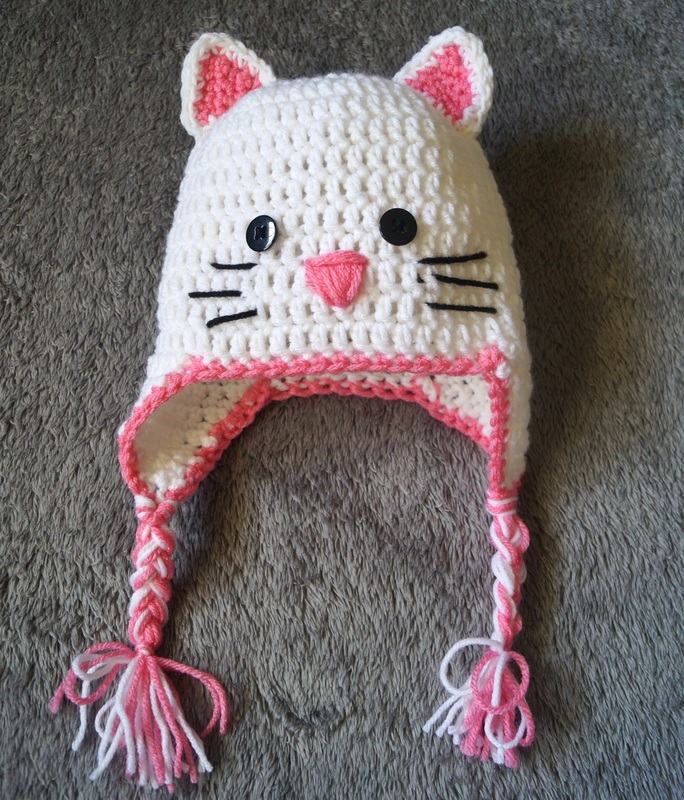
FLAPS & EARS x2 (white)
*Attach w/slip stitch for flaps.
FLAPS Row 1: 1 sc in next 10 st. ch 1 turn.
EARS Row 1: 1 sc in next 10 st. ch 1 turn.
Row 2: 1 sc in second st from hook, ch 1 turn.
Row 3: sc2tg, 1 sc in next 8 sts, sc2tg. ch 1, turn.
Row 4: 1 sc across, ch 1, turn
Row 5: sc2tg, 1 sc in next 6 sts, sc2tg. ch 1, turn.
Row 6: 1 sc across, ch 1, turn.
Row 7: sc2tg, 1 sc in next 4 sts, sc2tg. ch 1, turn.
Row 8: 1 sc across, ch 1, turn
Row 9: sc2tg x2, ch 1, turn.
Row 10: sc2tg
tug & cut.
*Attach PINK with a slip stitch and 1 sc all around the hat for the border.
Cut 3 strands white & 3 strands pink of equal length, fold in half. Use your hook to pull the loop part through the end of the flap. Pull the rest of the yarn through the loop to attach. Braid and secure.
INNER EARS x2 (pink)
Same as larger part of ears but starting on Row 4 and begin with chaining 9
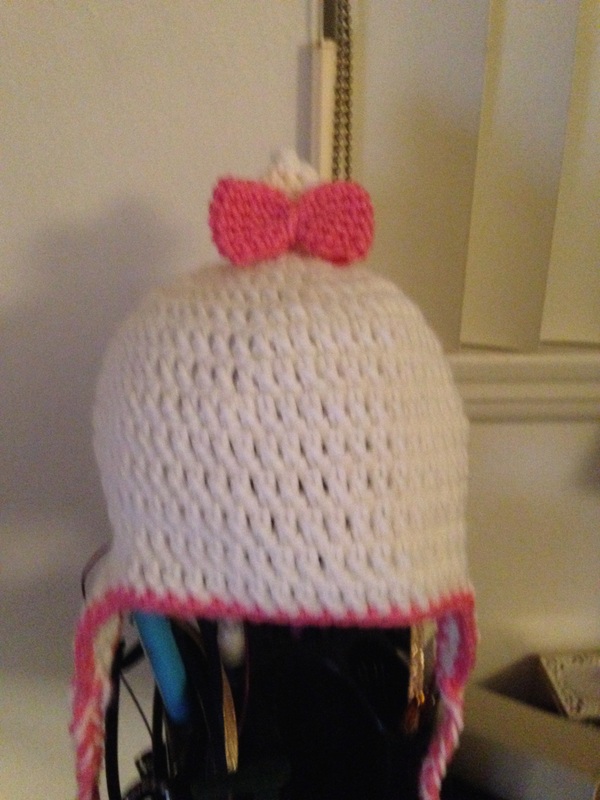
MARIE'S HAIR (white)
*worked in a round
Row 1: In a Magic Circle SC 6.
Row 2: 2 sc in each st.
Row 3-6: 1 sc in each st.
Row 7-8: 1 sc, sc2tg repeat all around until in a drop like shape.
BOW (pink)
Chain 20 and attach to form circle.
Row 1-6: 1 sc in each st around. join ch 1 keep going in the same direction.
*Leave a long tail at the end to wrap around middle of bow to create the pinch and use the yarn needle to secure the yarn down, also using the tail to sew to Marie's hair.
FACE
This is wear things got tricky. I had to first draw the shapes onto some paper, then transfer those shapes onto the felt. I've found that using chalk works the best for me. After that, I cut 2 of each of the shapes I needed and reversed one side to create both eyes. You'll need to cut the following.
Black : An almond shape for the base of the eye. 2 small rounds for the inner eye.
White: A smaller almond shape for the inner whites of her eyes.
Blue: 2 larger rounds to fit just in the whites but, larger than the black rounds so the color of her eye shows.
I used fabric glue to put them all together the let dry according to the label. After, I attached her eyes to the hat using the middle of the hat as a guide. This took a lot of laying down and moving things around to make sure it all looked right. After I had it where I wanted, I sewed it all down with a needle and thread, working on the black parts first, then around the whites of her eyes to reinforce them.
The white highlights of her eyes are painted on just the black portion to get that real cartoon feel. The eye brows and all whiskers are all embroidered using just some black yarn and a yarn needle. Her nose is similar with pink and a basic upside down triangle. The lashes are reinforcing the eyes as well since I punched the needle right through the black line above her eye.
I hope this wasn't too hard to understand. I love Marie! She's such a lady! :)
Please feel free to correct anything you may feel I missed in this pattern! Have a great day!
~Melissa
Bookworm Stitches
Hook: 5.0 mm
Size: Toddler. (This hat fit both my 2 year and my 6 year old just fine. I'm sure you can add or subtract a row in the increases and length to suite your needs but this is how I made Marie.)
*At the end of each row, sl st to join. Chain does not count as a stitch.
HAT
Row 1: 11 dc in a magic circle.
Row 2: 2 dc in each st. end 22 dc
Row 3: 2 dc in first st. 1 dc in next st. (repeat all the way around) end 33 dc
Row 4: 2 dc in first st. 1 dc in next 2 st. (repeat all the way around) end 44 dc
Row 5: 2 dc in first st. 1 dc in next 3 st. (repeat all the way around) end 55 dc
Row 6-13: 1 dc in each st around.
cut and weave ends.
FLAPS & EARS x2 (white)
*Attach w/slip stitch for flaps.
FLAPS Row 1: 1 sc in next 10 st. ch 1 turn.
EARS Row 1: 1 sc in next 10 st. ch 1 turn.
Row 2: 1 sc in second st from hook, ch 1 turn.
Row 3: sc2tg, 1 sc in next 8 sts, sc2tg. ch 1, turn.
Row 4: 1 sc across, ch 1, turn
Row 5: sc2tg, 1 sc in next 6 sts, sc2tg. ch 1, turn.
Row 6: 1 sc across, ch 1, turn.
Row 7: sc2tg, 1 sc in next 4 sts, sc2tg. ch 1, turn.
Row 8: 1 sc across, ch 1, turn
Row 9: sc2tg x2, ch 1, turn.
Row 10: sc2tg
tug & cut.
*Attach PINK with a slip stitch and 1 sc all around the hat for the border.
Cut 3 strands white & 3 strands pink of equal length, fold in half. Use your hook to pull the loop part through the end of the flap. Pull the rest of the yarn through the loop to attach. Braid and secure.
INNER EARS x2 (pink)
Same as larger part of ears but starting on Row 4 and begin with chaining 9
MARIE'S HAIR (white)
*worked in a round
Row 1: In a Magic Circle SC 6.
Row 2: 2 sc in each st.
Row 3-6: 1 sc in each st.
Row 7-8: 1 sc, sc2tg repeat all around until in a drop like shape.
BOW (pink)
Chain 20 and attach to form circle.
Row 1-6: 1 sc in each st around. join ch 1 keep going in the same direction.
*Leave a long tail at the end to wrap around middle of bow to create the pinch and use the yarn needle to secure the yarn down, also using the tail to sew to Marie's hair.
FACE
This is wear things got tricky. I had to first draw the shapes onto some paper, then transfer those shapes onto the felt. I've found that using chalk works the best for me. After that, I cut 2 of each of the shapes I needed and reversed one side to create both eyes. You'll need to cut the following.
Black : An almond shape for the base of the eye. 2 small rounds for the inner eye.
White: A smaller almond shape for the inner whites of her eyes.
Blue: 2 larger rounds to fit just in the whites but, larger than the black rounds so the color of her eye shows.
I used fabric glue to put them all together the let dry according to the label. After, I attached her eyes to the hat using the middle of the hat as a guide. This took a lot of laying down and moving things around to make sure it all looked right. After I had it where I wanted, I sewed it all down with a needle and thread, working on the black parts first, then around the whites of her eyes to reinforce them.
The white highlights of her eyes are painted on just the black portion to get that real cartoon feel. The eye brows and all whiskers are all embroidered using just some black yarn and a yarn needle. Her nose is similar with pink and a basic upside down triangle. The lashes are reinforcing the eyes as well since I punched the needle right through the black line above her eye.
I hope this wasn't too hard to understand. I love Marie! She's such a lady! :)
Please feel free to correct anything you may feel I missed in this pattern! Have a great day!
~Melissa
Bookworm Stitches

 RSS Feed